Mobile App Development
- Allright, mobile app is the in thing. Can we make a vn-canvas game and package it as a mobile app?
- The answer is yes, with Cordova/Phonegap. But it's not as straightforward as it sounds if you're just starting. So let's hop on to it!
- First up, I'm going to mention a number of tools, with their dependencies, but I'm not going to provide instructions on how to install it. There are already dozens of good tutorials on the web, and I just follow them myself. So I'm not going to repeat what they have provided so well already.
Visual Studio Community Edition 2015
- This is perhaps the easiest way to get started. This new edition comes with a one-stop shop installer that lets you select all that you need for development and download it for you, even third party tools. Not only that, Visual Studio makes it possible to use the code you make for cross-platform development, i.e. common code for Android, iOS, Windows Phone, etc. Neat, huh? And it's free, for indie developers at least. Enterprise users would need a license.
- For our purposes, make sure to check the Javascript Development and/or the Apache Cordova Tools during installation. After installation, you can use the wizard to make a Cordova project and everything will be set for you.
- But wait, I said easiest, not painless. I've run into a few quirks while trying out the tool.
- Building the wizard-generated code failed for me, with a rather curious error message - NONE. It just failed. After two days of searching, I finally was able to resolve the issue by downgrading nodeJS to 0.10.29.
- Certain features of Visual Studio requires Windows 8 or later. If you're like me who has done much customization of his Windows 7 system and would not want to take the risk of dozens of applications running into compatibility problems, you'd have to live with it. One notable feature missing - the Visual Studio Emulator.
- Visual Studio eats up a lot of memory. Run that alongside an Android emulator and you have a good test for patience. Unless you have a high end system.
- Linux and Mac users, tough luck. It's a Microsoft product, so you need Windows.
Android Studio
- As the name implies, it's an Android development tool. Thus no cross platform capability.
- Installation was no problem, though I'm not sure if the Android SDK was incorporated or not. I installed my SDK separately.
- Memory footprint-wise, it is lighter on the system compared to Visual Studio. Running an emulator is not as taxing to my mid-class system as well.
- In terms of user interface however, having worked with Visual Studio before, I found Android Studio less familiar. Hence I was at a loss how to start, even with wizard generated codes.
Eclipse with Android Developer Tools Plugin
- Widely considered as still the best tool for cross platform development, Eclipse is what I consider as a generic IDE with various flavors. Specifically for Android development, the Java Developer EE with Android Developer Tools plugin (a separate download) would be the best choice.
- Like the two IDEs mentioned above, Eclipse allows you to create a new Android project and generates the codes to get you started. The interface, though, takes a little getting used to.
- What probably sets it apart from Android Studio is that it is not specifically an Android-only development tool. So if you want to move to another platform, though you may or may not be able to reuse the same code, you'll be using the same IDE.
- For the remainder of this journey, we shall be focusing on Android development with Eclipse. It is assumed that you have the tools installed as well as Android SDK and its dependencies.
- I'm not gonna add to the confusion between Apache Cordova and Adobe Phonegap. All I know is that these libraries allow a web application (using HTML, CSS and Javascript) to be packaged as a native app that can be deployed to mobile devices. This looks promising to a vn-canvas game, as we can package it into an app, and thus no more peeking at the code to cheat on the story. So I'm gonna hop right in, make my choice, and use Cordova.
- First, let's install it. I installed it via nodeJS (npm). As of this writing, the latest version is 5.3.1.
npm -g install cordova
- Next would be to create the project using Cordova CLI, specify the Android platform and build it.
cordova create <proj_name>
cd <proj_name>
cordova platform add android
cordova build
- Let's import the built project into Eclipse, via a new Android project from existing code. In my case, there were several projects detected. I picked two - CordovaLib and the main platform project, curiously named MainActivity. First I built CordovaLib, making sure I get the jar library at the end of the build. Then I added this as an External jar library to the main platform project (which I refactored or renamed to my <proj_name>).
- After a successful build of the Cordova template project, I launched it on the Android emulator to see if it runs. Success! I got the blinking Device ready message. Time for the next step.
- I guess it would be a matter of user preference which Cordova or PhoneGap version to use. As long as that demo app runs, then you're ready to move on to the next step.
- First step would be to run the boilerplate. Nothing fancy yet, just to make sure we got our libraries imported correctly. Easy-peasy, right?
- The default Cordova structure I got (depends on Cordova version) has the following under the platforms/android/assets folder:
<assets>/
	www/
		cordova-js-src/
			<cordova javascript>
		css/
			index.css
		img/
			logo.png
		js/
			index.js
		plugins/
			<plugins folder>
		cordova.js
		cordova_plugins.js
		index.html
- Let's plug in our boilerplate one file at a time, starting with index.html. Change the default index.html
to something similar as below. Note: this method should work even if you already have started or completed your game,
not just the boilerplate. Notable changes are highlighted in green.
<!DOCTYPE html> <html> <head> <meta http-equiv="Content-Security-Policy" content="default-src 'self' data: gap: https://ssl.gstatic.com 'unsafe-eval'; style-src 'self' 'unsafe-inline'; media-src *"> <meta name="format-detection" content="telephone=no"> <meta name="msapplication-tap-highlight" content="no"> <meta name="viewport" content="user-scalable=no, initial-scale=1, maximum-scale=1, minimum-scale=1, width=device-width"> <!-- Place your game title here --> <title>Game Title</title> <!-- Place a description of your game here --> <meta name="description" content="Description of the game." /> <link rel="stylesheet" href="css/style.css" /> <link rel="stylesheet" href="css/zerogrid.css" /> </head> <body> <div class="zerogrid"> <div class="row"> <!-- Define the game canvas here, including dimensions and style --> <div class="col-full"> <div class="wrap-col"> <canvas id="stage" class="col-full" style="border:1px solid black" oncontextmenu="return false;" onselectstart="return false;"> <!-- Place your custom message here if user is not using an HTML5-capable browser --> Your browser does not appear to support HTML5. Try upgrading your browser to the latest version. </canvas> </div> </div> <!-- If using non-standard fonts, load it here. This is a workaround. --> <!--<div style="font-family:custom_font_name"> </div>--> </div> </div><!-- END GRID --> <script type="text/javascript" src="cordova.js"></script> <script data-main="scripts/init.js" src="scripts/require.js"></script> </body> </html> - Make sure to copy all css files you have (including zerogrid.css) to the css/ folder and require.js to the scripts/lib/.
- We will also be needing a deviceReady plugin for requirejs. See link. Copy the plugin to our scripts/lib folder.
- Now let's create our init.js inside scripts folder. Note that this is quite similar to v.0.5.x init.js, so you
should be familiar with it already, except for the additional code (highlighted in green) inside the callback function
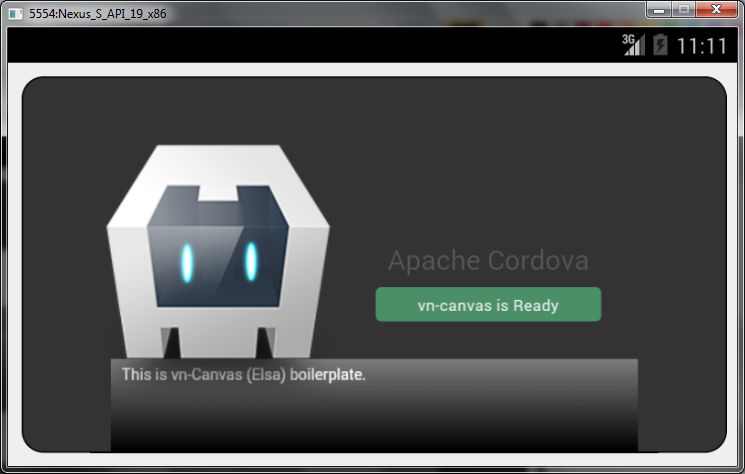
which are cordova specific. Basically, it tells us when the Cordova library is ready for use.
require.config({ baseUrl: "scripts", paths: { lib: 'lib', app: 'app', // add game path here as needed, e.g. game: 'game' } }); require(['lib/deviceReady!', // load TOC here "game/vntoc", // load 3rd party modules "app/canvastext-0.4.1.mod", // load base engine "app/vncanvas-base", // load (optional) engine modules "app/vncanvas-cmds", "app/vncanvas-media", "app/vncanvas-form", "app/vncanvas-cform", "app/vncanvas-bgnd", "app/vncanvas-actor", "app/vncanvas-atmo", "app/vncanvas-script", "app/vncanvas-chkpt", // place config, plugin, macro, etc. files here "game/vnconfig", // config "game/vnplugins", // plugins "app/vnmod-rpg-0.4", // modpack ], function (isCordova) { if (isCordova) { document.addEventListener( 'pause', onPause.bind( this ), false ); document.addEventListener( 'resume', onResume.bind( this ), false ); // TODO: Cordova has been loaded. Perform any initialization that requires Cordova here. /* vn-canvas initialization */ Stage.Init("stage", 640, 400); Stage.script.Init("vnchapter"); } function onPause() { // TODO: This application has been suspended. Save application state here. }; function onResume() { // TODO: This application has been reactivated. Restore application state here. }; }); - Screenshot below shows vn-canvas boilerplate running on Android emulator with Apache Cordova.